The Beginner’s Guide to Homemade Pizza Dough (Simple Recipe that ANYONE Can Master!)
This post may contain affiliate links. You can view our Affiliate Marketing Legal Disclaimer here.
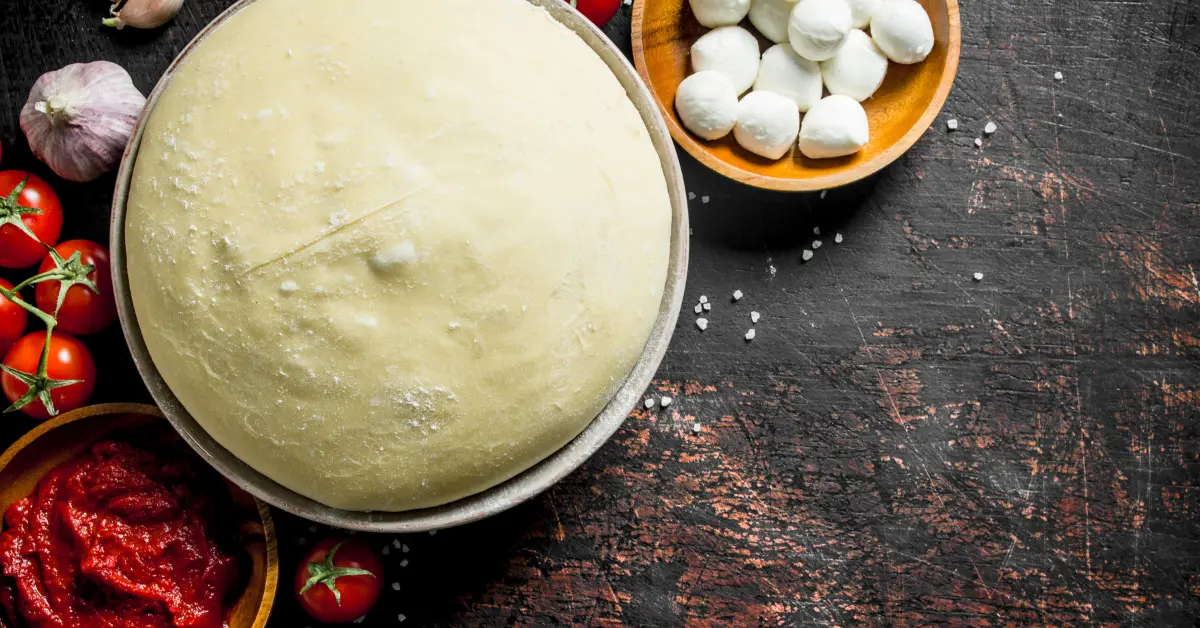
Do you dream of making pizza that tastes like it came straight out of a fancy restaurant? The secret is easy homemade pizza dough! Today, we’re embarking on your first baking adventure, where you’ll learn how to make your own pizza dough from scratch with just a few simple ingredients.
Sound intimidating? Don’t worry! This beginner-friendly pizza dough recipe is a step-by-step guide that will have you feeling like a pizza-making pro in no time. We’ll even cover how to use your masterpiece dough, transfer it to the oven like a boss, how to store any leftovers for future pizza nights, and much more.
Ready to ditch the delivery box and conquer pizza night like a champion? Let’s get started!
Why should you try this beginner-friendly pizza dough recipe
The Internet is overflowing with pizza dough recipes. So, why should you care about this one?
This recipe is designed specifically for beginners and is based on my own experience and a tried-and-true pizza dough recipe created by chef Chris Bianco. If you’d like to check out that recipe as well, you can visit my blog post, Perfect Pizza Dough Recipe: Pizza Dough the Chris Bianco way!
This easy pizza dough recipe doesn’t require any fancy ingredients, or complicated techniques. We’ll break down the process into easy-to-follow steps, with tips and tricks along the way.
Before we begin, let me tell you a brief story about why making pizza dough can be both fun and rewarding.
How homemade pizza dough saved our date night
About 12 years ago, my wife and I were cuddling up on the couch on a Friday night, Netflix ready, craving some cheesy comfort food. A national pizza chain seemed like a safe bet. Forty-five minutes later, a sad, soggy mess arrived in a cardboard box. The pizza arrived pale and greasy, and the crust was a doughy disappointment. One bite and our movie night magic fizzled.
I refused to let our night end on such a low note. I turned to my wife and mumbled: “We have flour, and yeast right?” When we searched our pantry, there they were. The simple ingredients that could turn this around for us.
We fumbled through the kneading process, laughing as dough clung to our fingers. Messy, bubbly, but undeniably ours. After a bit of playful chaos, there it was. An almost perfectly round ball of sticky pizza dough that was born out of pure love.
While the dough rose, we raided the fridge for toppings. We found some mozzarella in a gift basket my wife got as a gift from work, a jar of roasted peppers, some fresh basil, and a jar of pasta sauce from the week before (don’t judge, it was all we had that night).
Finally, our lopsided pizza emerged from the oven. The aroma of fresh-baked bread filled the air. The crust was crispy with a perfect chew. This homemade pizza, born from our little kitchen adventure, surpassed anything that a delivery box could offer.
More important, the experience saved our date night. We laughed, got messy, and created something delicious together. The magic of homemade pizza dough isn’t just about the perfect crust; it’s about creating something special and sharing it with the ones you love.
Enough waffling around; let’s get started on your own pizza dough adventure!
Simple Pizza Dough Recipe for Beginners
This pizza dough recipe is easy to follow and requires just a few simple ingredients that yield roughly 2 medium-sized 12-inch pizzas.
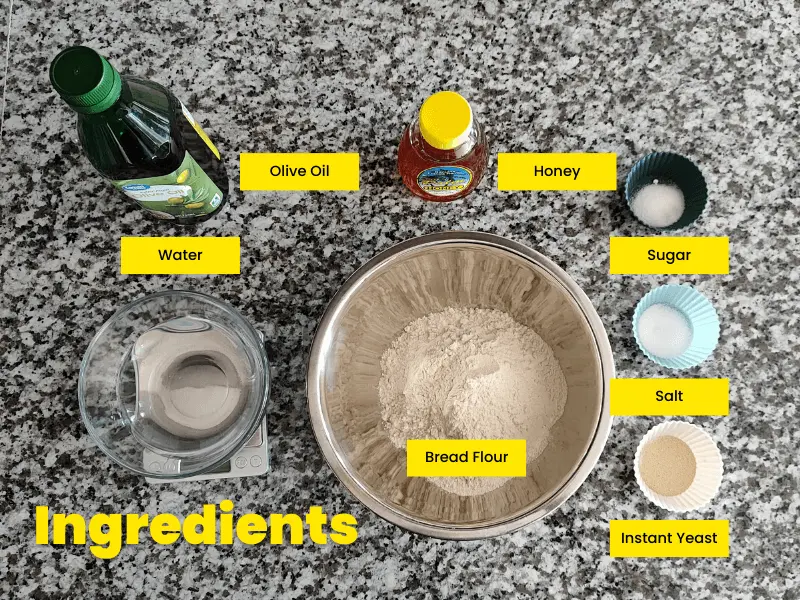
Ingredients
For this homemade tomato sauce recipe you only need four ingredients:
- 300 gr of bread flour. This is about 2.5 cups.
- 195 ml of room temperature or warm water. Approximately 6.5 oz or a little less than 1 cup.
- 3.0 gr of instant dry yeast (or 1 teaspoon).
- 9.0 gr of salt (or 2.25 teaspoons).
- 4.5 gr of sugar (or 1.25 teaspoons).
- 9.0 ml of Extra Virgin Olive Oil (or 2.25 teaspoons) for extra flavor.
- 6.0 ml Honey (or 1.5 teaspoons) for extra flavor, which also helps with browning.
Let’s break down each ingredient and why they play an important role in the final product:
- Bread Flour: While most pizza dough recipes you’ll find online use all-purpose flour as the base ingredient, this recipe uses bread flour because it gives the final dough more structure. If you already have all-purpose flour in hand, just remember to use a bit more since all-purpose flour is less dense than bread flour.
- Water: Use warm water (warm to the touch but not hot) to help activate the yeast. This recipe for beginners will produce a 65% hydration pizza dough, which will be much easier to handle than most recipes you’ll find online.
- Instant Dry Yeast: Using instant dry yeast will make getting this pizza dough up and running easier, as it doesn’t need to be rehydrated before use.
- Salt: Salt is a flavor enhancer, balancing the sweetness of the yeast and bringing out the delicious savory notes in the pizza dough.
- Sugar: A bit of sugar will help the pizza dough brown while it’s baking.
- Extra Virgin Olive Oil: Olive oil adds a touch of richness to the dough and helps create a slightly crispy crust.
- Honey (optional, but so worth it!): While not always used, a bit of honey can add sweetness and promote browning for an even more beautiful crust. Think of it as the secret weapon that adds a touch of golden perfection to your final pizza crust.
Step-by-step pizza dough instructions
Now, it’s time to put everything together. A bit of warning: this process involves floury fingerprints and a playful battle with slightly sticky dough. But fear not, because these messy moments lead to the most rewarding pizza slices!
Step 1: Prepare the yeast.
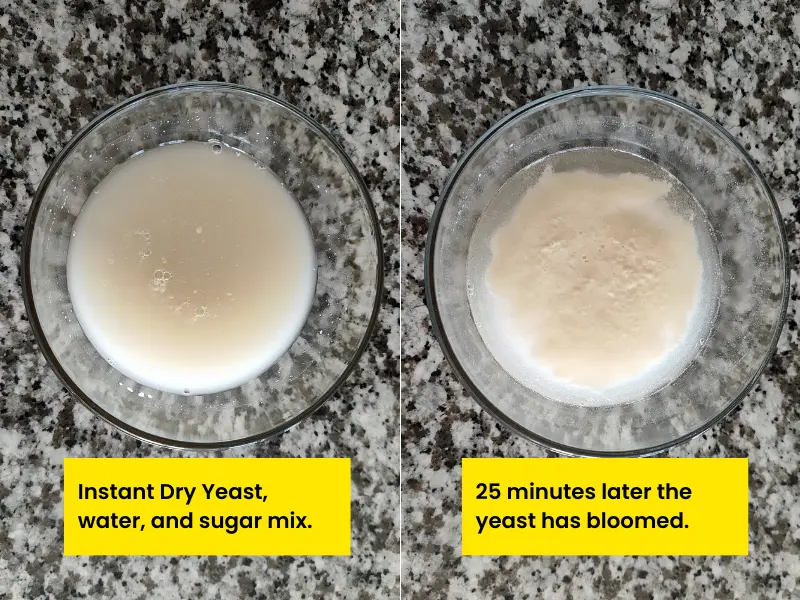
Since we’re using instant dry yeast, you could skip this step. However, it’s always nice to know that the yeast works properly before using it.
Step 2: Mix in the dry ingredients.
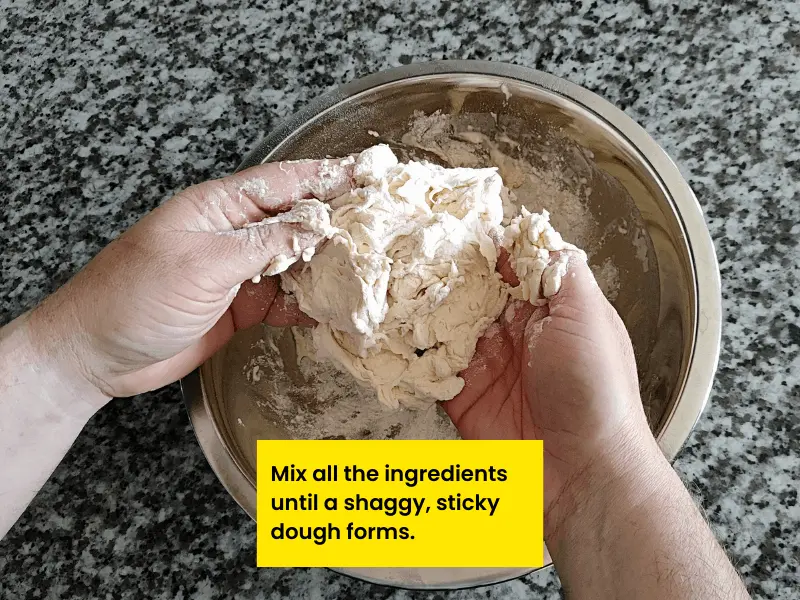
To this mix of dry ingredients, you will now add the water and yeast solution we created earlier. Mix both wet and dry ingredients until well incorporated and a shaggy dough forms.
If you’re using Extra Virgin Olive Oil and honey, this is the time to mix them in. Keep mixing until everything is incorporated and forms a sticky ball of dough.
Step 3: Knead the pizza dough
Kneading is the most important step in making pizza dough. It builds gluten, making your dough strong, stretchy, and perfect for that amazing crust we all love.
First, lightly sprinkle your work surface and your hands with some flour.
Using the palms of your hands, push the dough away from you, alternating hands with a rocking motion. If you feel the dough sticking too much to your hands or to your work surface, dust it with a little more flour. The trick is using as little extra flour as possible.
As you knead the dough, you will feel it smooth out. Keep kneading the pizza dough for 5 to 10 minutes. By this time, the dough should feel softer and more elastic.
You know your pizza dough is ready by doing the following:
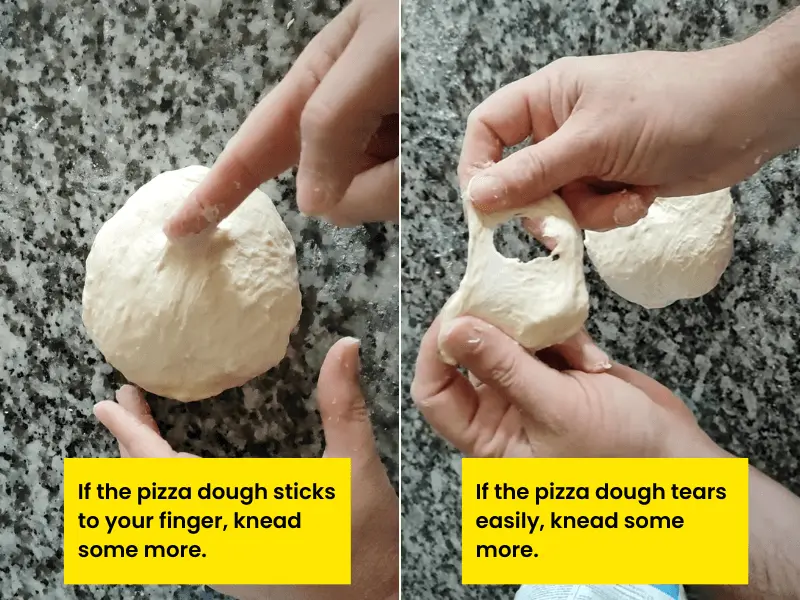
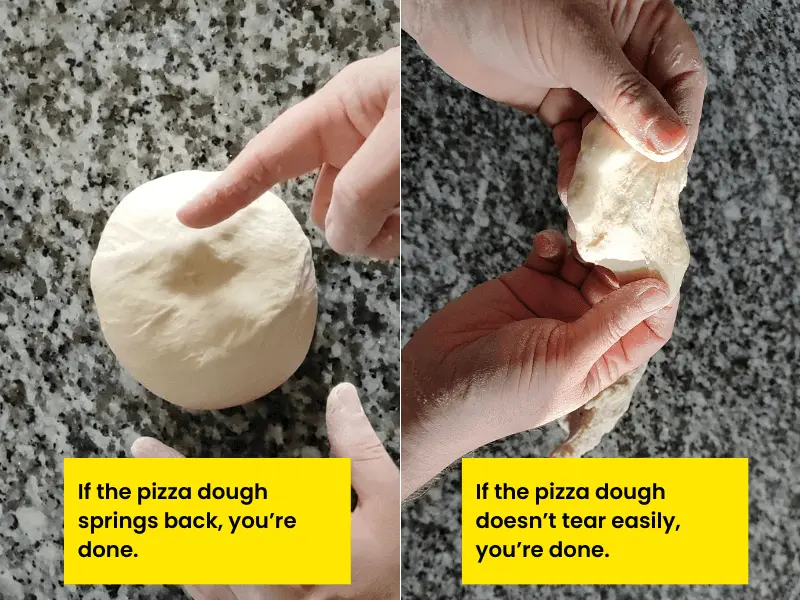
- Bounce test: Form a rough ball and push it down with one finger. If the dough ball slowly bounces back, it’s ready. If the dough ball sticks to your finger, keep kneading.
- Windowpane test: Cut a small piece of dough and gently stretch it. If you can see light through it without the dough tearing, it’s ready. If the pizza dough tears easily, keep kneading.
Step 4: Let the pizza dough rise
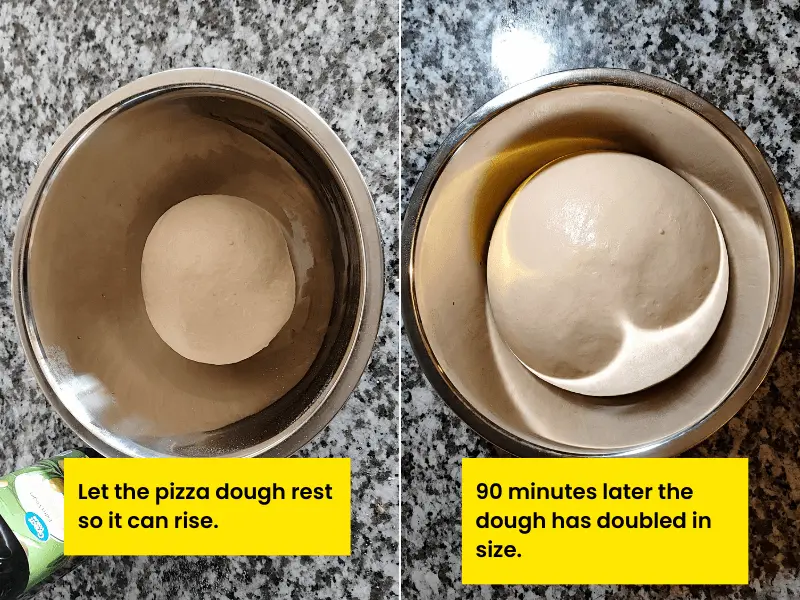
Let the dough stand at room temperature for 60 to 90 minutes. This will give the dough time to rise and double in size.
Step 5: Time to stretch the dough into its iconic pizza shape
There are many ways you can go about stretching your pizza dough. I’m going to show you the two easiest ones.
The first option is using a rolling pin to flatten the dough ball into a 12-inch wide and approximately half-inch thick disc.
The second way, and my preferred method, is to stretch the pizza dough by hand.
With your fingers, lightly push down from the middle to about an inch of the edge of the dough. What you’re looking for is to push the air that’s formed in the middle all the way to the edges. You can turn the dough over, and do the same on the other side.
When you can comfortably fit two hands inside the disc, hold the edge of the dough with your fists and let gravity stretch it further. Slowly move the dough around with your fists to get an even stretch until you form a 12-inch wide round pizza dough shape.
If the pizza dough starts shrinking down and is not keeping its shape, don’t panic. Cover the dough with a damp towel and let it rest for 5 minutes. When you come back, it will be much easier to handle and shape.
My pizza dough is ready, now what? Let’s make some pizza!
Now is where the fun begins!
Preheat your oven to 450°F (230°C). If you have a pizza stone or pizza steel, this is the time to put it in your oven.
While the oven preheats, spread your favorite pizza sauce from the middle of the dough out towards the edge. Leave about an inch of the dough without sauce. I always like to sprinkle some fresh Parmesan cheese over the pizza sauce before baking.
Now load your pizza with as much cheese as you like. Mozzarella will be your classic choice, but feel free to experiment with other cheeses like cheddar, provolone, or even ricotta.
Add any other toppings you like: pepperoni, bacon, peppers, or any others. And finally, brush some olive oil over the crust to get it extra crispy.
Bake your pizza for about 12 to 15 minutes, or until the pizza crust is golden brown and the cheese is melted and bubbly.
The Great Pizza Transfer: Transferring Your Pizza to the Oven (Without a Disaster!)
In my experience, learning how to safely transfer your pizza into the oven is just as important as learning how to make the pizza itself. Here’s where your trusty tools come in: the pizza screen, and the pizza peel.
The Humble Pizza Screen: Your Safety Net
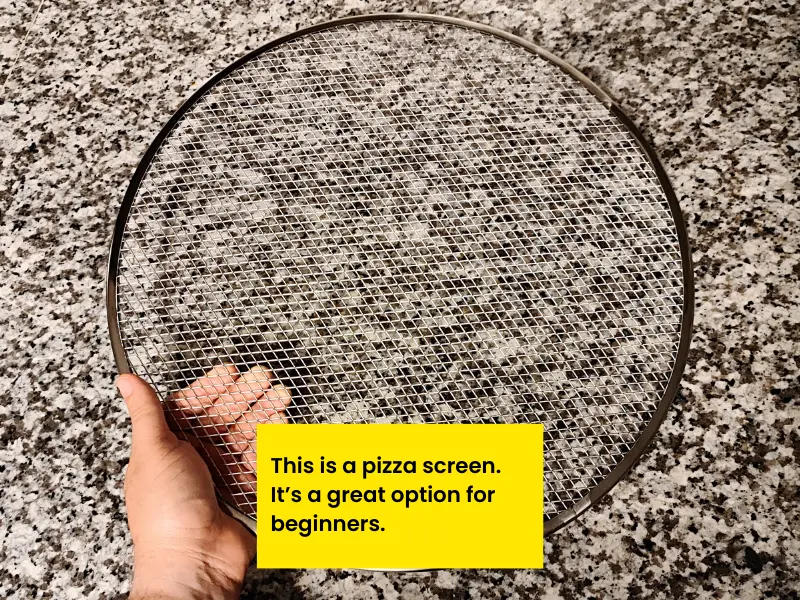
- Preheat your oven: Preheat your oven to 450°F (230°C) and let it sit at that temperature for an hour. A hot oven is crucial for a crispy crust.
- Assemble your pizza on the screen: Carefully slide your pizza dough onto the screen and load it up with pizza sauce, cheese, and your favorite toppings.
- The Big Slide: This is the easy part. Just slide the pizza screen with your creation inside the hot oven. We find that the second lowest rack works best for achieving a crispier pizza crust.
The Pizza Peel: The Chef’s Choice for a Flawless Transfer
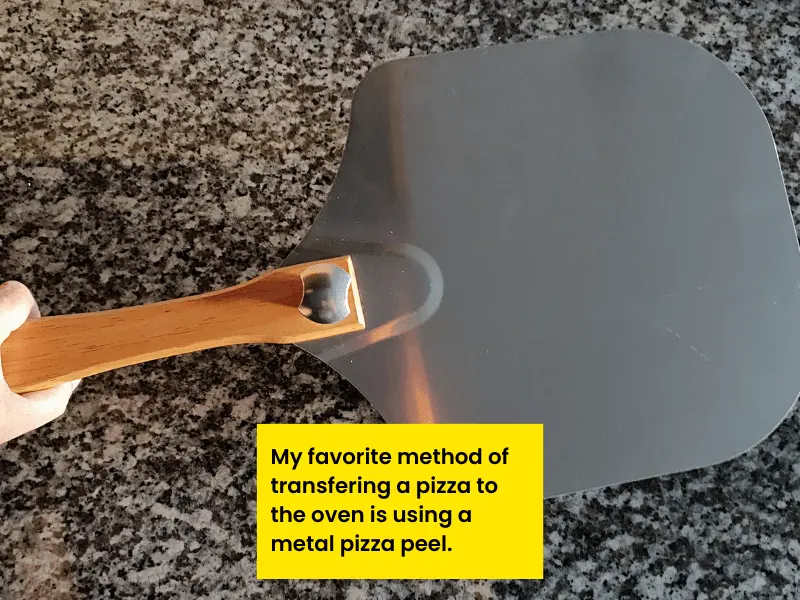
Here’s how to master the peel technique:
- Sprinkle with Flour: Lightly dust your pizza peel with coarse flour (semolina or cornmeal works great) to prevent sticking.
- Build and Slide: Once you’ve assembled your pizza, carefully pinch and lift the pizza dough to make room for the pizza peel. Very deliberately slide the pizza peel under the finished product and give it a flick back to get the whole pizza on the peel.
- Test for Looseness: Now that your homemade pizza is on the peel, give it a shake to make sure that the dough isn’t sticking to the pizza peel. This step is crucial for the perfect pizza transfer.
- Time for the Perfect Transfer: Place the pizza peel on the preheated pizza stone or pizza steel. With a quick, confident jerk backward, pull the peel straight out of the oven. Your pizza should be resting comfortably on the hot surface.
Bonus Tip: If your pizza is sticking to the peel, you can use a spatula to gently lift the pizza dough where it’s sticking and use more semolina or cornmeal to help loosen any stubborn spots.
No matter which method you choose, confidence is key! With a little practice, you’ll be transferring your pizzas like a pro in no time.
How do I store leftover pizza dough?
The refrigerator is your best bet for storing leftover pizza dough. The cool temperature slows down the yeast activity, putting your dough into a state of hibernation. This allows you to enjoy fresh, homemade pizza another day (or two!).
Here’s how to properly store your pizza dough in the refrigerator:
- Take all the leftover pizza dough and form a rough ball.
- Coat your pizza dough ball with a little Extra Virgin Olive Oil. This will prevent it from drying out and forming a tough crust.
- Put the pizza dough ball in an airtight container or wrap it with some plastic wrap.
- Place the container or plastic-wrapped pizza dough ball in the fridge. Refrigerated dough can stay fresh for up to 2 days. Just be sure to let it come to room temperature for about 30 to 60 minutes before using it again.
Can I freeze pizza dough?
There will be times when you don’t exactly know when you’ll use all or part of your pizza dough and you just don’t want all your hard work to go to waste. This is where freezing your pizza dough can be an absolute game-changer.
Freezing your pizza dough is much like storing it in the fridge. Here’s how to do it properly:
- Portion your pizza dough into smaller dough balls. These should be big enough for you to make one pizza with each dough ball later on.
- Coat each pizza dough ball with Extra Virgin Olive Oil and wrap them individually with plastic wrap. This will protect your dough balls from freezer burn.
- Place each pizza dough ball in a freezer bag, squeeze out all the air out of the bag, and seal tightly.
- Place the pizza dough balls inside the freezer, and you’re done!
Remember to always label your pizza dough balls with the date you froze them. Pizza dough can be stored safely in the freezer for up to 3 months.
When you’re ready to use your frozen pizza dough, move them to the fridge so they can thaw overnight (at least 12 hours). Then, bring them to your kitchen counter and let them stand at room temperature for 30 to 60 minutes before using them.
Why is my pizza dough sticky?
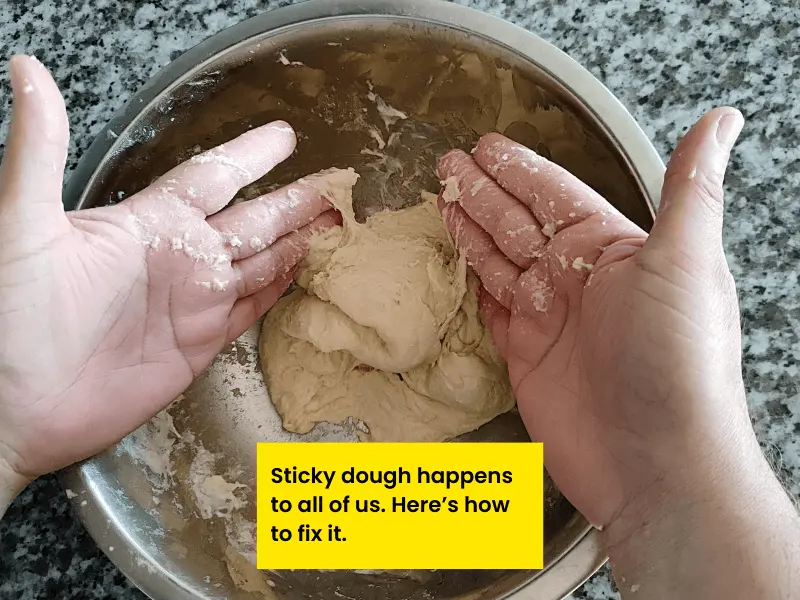
Let’s take a look a both of these reasons and what you can do to fix them.
1. Over-hydrated pizza dough: The most common culprit is adding too much water. Water activates the yeast and hydrates the pizza dough, but too much water can make it feel like you’re wrestling with a blob of glue.
To make your pizza dough easier to handle, you can sprinkle some extra flour on your hands and the dough. Just remember to use as little extra flour as possible to keep things manageable. Using too much flour can change the hydration level of the pizza dough and have a big impact on the texture, and tenderness of the final pizza crust.
2. Under-kneaded pizza dough: Kneading develops gluten, which is the elastic network that gives your pizza dough its structure and elasticity. If you haven’t kneaded the dough long enough, the gluten won’t have a chance to develop properly, resulting in a sticky mess.
If you’ve already tried adding a bit of extra flour and your pizza dough is still a sticky mess, this is a sign that you need to knead your dough more. Let your pizza dough rest for 5 to 10 minutes and knead it some more. The longer you knead, the more it will transform and become softer and more elastic.
To test if you’re done kneading, gently poke the pizza dough with your finger. If it sticks to your finger, you knead to keep kneading, if it bounces back like a champ, you are ready to continue your pizza adventure.
Conquer Pizza Night with this Easy Homemade Pizza Dough Recipe! (Recap)
This recipe for beginners breaks down homemade pizza dough into easy-to-follow steps. Here are some key takeaways:
- This recipe uses bread flour for a chewier crust that holds all your favorite toppings.
- No fancy ingredients or complicated techniques are required, just pure pizza-making joy!
- Master the knead: It’s the secret to a soft, stretchy dough that makes the perfect pizza crust we love so much.
- Leftover pizza dough? Store it in the fridge for 2 days or freeze it for up to 3 months!
The journey from flour to a perfect pizza might have a few bumps along the way. But with a little patience, some practice, and the knowledge you gained here, I know you can succeed and experience the magic of homemade pizza.
If you enjoyed this pizza dough recipe for beginners, please share it with anyone you know would like to begin their own pizza-making journey!

ABOUT THE AUTHOR
I'm Rufino Rosado and my love for pizza has fueled a lifelong obsession. I've devoured countless slices, experimented with every style imaginable, and even endured my fair share of kitchen disasters. But through trial and error, I've transformed my passion into expertise, mastering the art of crafting restaurant-quality pizza at home. Now, I'm here to share my hard-earned knowledge and guide you on your own pizza journey, no matter your skill level.

Share this post!

ABOUT THE AUTHOR
I'm Rufino Rosado and my love for pizza has fueled a lifelong obsession. I've devoured countless slices, experimented with every style imaginable, and even endured my fair share of kitchen disasters. But through trial and error, I've transformed my passion into expertise, mastering the art of crafting restaurant-quality pizza at home. Now, I'm here to share my hard-earned knowledge and guide you on your own pizza journey, no matter your skill level.
